VMware Workstation 14 was released recently and you can now set up the VCSA in your Workstation Lab environment more efficiently than ever. There are many blog articles out there that outline how to do this in previous versions of Workstation. You basically have to modify the .vmx file before powering on the imported OVA file. You no longer have to do that. Watch how easy this is in Workstation 14.
The OVA file for VCSA 6.5 Update 1 is located in the ISO file for the appliance. Navigate to the ‘vcsa’ folder and you will find the OVA as you see in the screenshot below.

Launch VMware Workstation 14 from your PC and navigate to File > Open… and browse to the VCSA OVA file and click Open. The Import Virtual Machine wizard will begin.
- Accept the EULA and click Next.

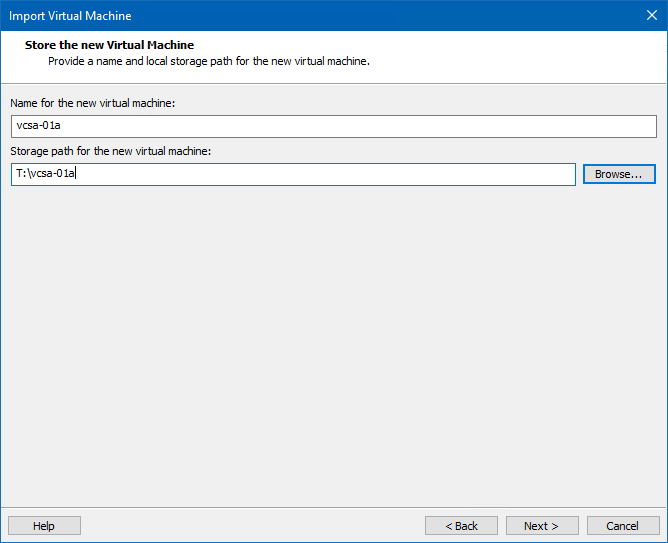
- Enter a Name and Location for the new VM and click Next.
- On the Deployment Options page (NEW) you can choose various options of the VCSA appliance. This was not available before. Scroll through the options and choose which VCSA deployment you want and click next. In this example I just want to deploy a Platform Services Controller (PSC).

- On the Properties page you have several configuration options on the left. Select each one individually and enter configuration parameters on the right. When you are finished select Import.
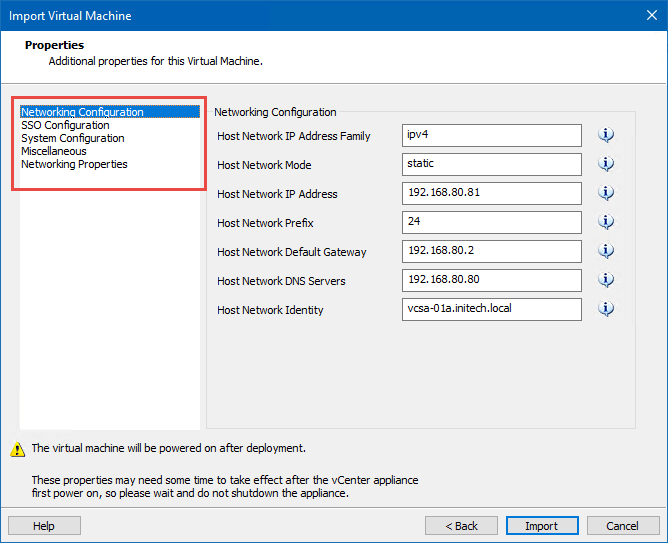
Your new VCSA appliance will take a little time to deploy and power on. Take note of the messages at the bottom of the Properties page. The VM will power on after it is deployed AND it may take some time for your configuration parameters to take effect. So be patient and don’t power it off or else you will need to start all over again. Simply monitor the boot up process and keep an eye on it.
By default the new VCSA appliance will be configured with the “Bridged: Connected directly to the physical network” network option. Make sure you are connected to the correct virtual network in Workstation. I modified my connection settings while the appliance was booting and had zero issues.
Also, if you use the FQDN of the appliance like I did above make sure DNS is functioning properly. If you do not have DNS configured then enter the IP address of the appliance for the ‘Host Network Identity’ option. Otherwise you may have an error, services will fail to start and you will have to start all over again.
Once the appliance comes online simply open a browser and proceed with the configuration of the appliance.
https://<IP-address_or_FQDN>:5480/
I probably should have named my new appliance ‘psc-01a.initech.local’ in my configuration above but I’m not worried about that right now. I just wanted to share all of this with you who may have limited resources for testing or labbing with the VCSA. VMware Workstation has a much easier and more efficient method now for you to accomplish this.
I have to admit I had to exhibit a little extra patience at first with this one. The deployment failed a few times before finally succeeding. Many of those faults I attribute to my underlying Windows OS running Workstation 14. Make sure you have enough resources to accomplish what you attempting to deploy…CPU, memory and disk space!
Good luck labbing some vSphere 6.5 and most importantly have fun with it!
