In this blog article I will walk you through the deployment for vSphere Integrated Containers (VIC) into a vSphere 6.5 environment. This environment is a nested sandbox environment that I use regularly. You should certainly be an experienced vSphere administrator before attempting this and if you already have knowledge of any container technology or Docker then that will be a huge plus for you.
So what is VIC?
VIC is a feature in vSphere that enables virtual admins to create “container hosts” that are integrated with vSphere. VIC uses existing vSphere constructs thus allowing you to build on your existing vSphere investment. Developers can that use their Docker CLI or API in secured container VMs once everything is provisioned. To put it in a nutshell for you…VIC provides developers with “self-service” capabilities while administrators can control resources simultaneously. The containerized applications literally run alongside existing virtual machine workloads.
If you want to learn more about VIC before deploying check out the various links that I have provided at the bottom of this blog article.
Environment Overview
So let’s do a quick overview of the environment I will be using to deploy VIC. It’s a small vSphere 6.5 environment. I am used a single VCSA appliance with embedded PSC. I have two (2) ESXi 6.5 hosts and a couple CentOS 7 virtual machines running. Here is a summary of what I am working with in my nested vSphere 6.5 environment.
- Single VCSA appliance with embedded PSC (vCenter 6.5 U1)
- Two (2) ESXi hosts running vSphere 6.5 U1
- 4 processors per host
- 12 GB memory per host
- Two (2) iSCSI VMFS 6 datastores
Now when it comes to deploy the OVA appliance for VIC you must deploy it from vCenter. You cannot deploy it from a standalone ESXi host. After deploying the OVA we are going to then install the vSphere Client plug-ins on our vCenter Server appliance and lastly open the required ports on the ESXi host firewalls. Here is a summary of the steps we are going to take.
- Deploy VIC OVA appliance from vSphere Web Client.
- Install the vSphere Client plug-ins.
- Open the Required Ports on our ESXi hosts.
Other requirements that you should must verify before proceeding with the deployment:
- Make sure your vCenter Server appliances and ESXi hosts have their DNS and NTP configured! You do not want any skewed clocks between vCenter and the VIC appliance.
- Deploy appliance to a vCenter Server that meets the following (minimum) system requirements.
- vCenter Server 6.0 or vCenter Server 6.5
- ESXi 6.0 or 6.5 hosts
- 2 vCPU / 8 GB of memory
- 80 GB of free space in the target datastore
A very important thing to make note of if you intend on using ‘Custom Certificates’ in your vSphere infrastructure. The VIC Management Portal requires the TLS private key to be in the PEM-encoded PKCS#8 formatted file. If you need to convert your keys you can do so by running the following commands.
- Convert from PEM-encoded PKCS#1 to the required PEM-encoded PKCS#8
$ openssl pkcs8 -topk8 -inform PEM -outform PEM -nocrypt -in key.der -out key.pkcs8.pem
- Convert from DER-encoded PKCS#1 to the required PEM-encoded PKCS#8
$ openssl pkcs8 -topk8 -inform DER -outform PEM -nocrypt -in key.der -out key.pkcs8.pem
- Convert from DER-encoded PKCS#8 to the required PEM-encoded PKCS#8
$ openssl pkcs8 -inform DER -outform PEM -nocrypt -in key.pkcs8.der -out key.pkcs8.pem
You can also reference these commands from vSphere Integrated Containers documentation webpage.
Deploying the VIC Appliance (OVA)
Here were are going to deploy the OVA file for VIC. For specifics, I am going to be deploying VIC version 1.2.1 from my vSphere Web Client. You must use the flex-based vSphere Web Client to use this. OVAs cannot be deployed from the HTML5 client and the legacy Windows client is no longer available.
Make sure you have a static IP address ready to go for the VIC appliance. I will be installing my appliance on the same management network segment where my VCSA is running. Make sure that DNS host and PTR records are accurate before proceeding.
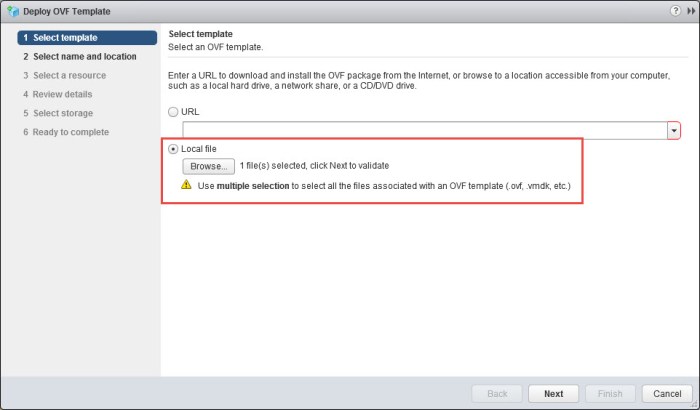
- Right-click your cluster (or host) and select the Deploy OVF Template option.
- On the Select Template portion of the wizard, select Local File and click the Browse button. Locate your downloaded OVA file for the VIC appliance and click Next when you are ready.
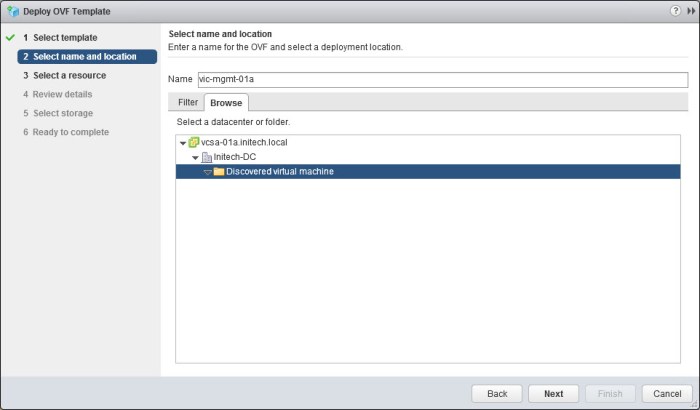
- Provide a name for the VM, select a destination folder and click Next.
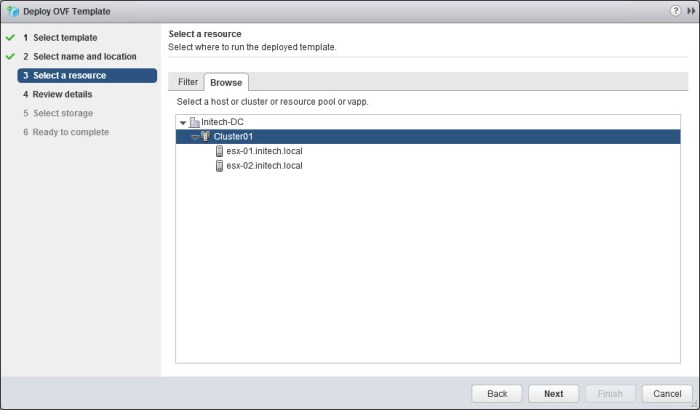
- Select a cluster (or specific host) resource and click Next.
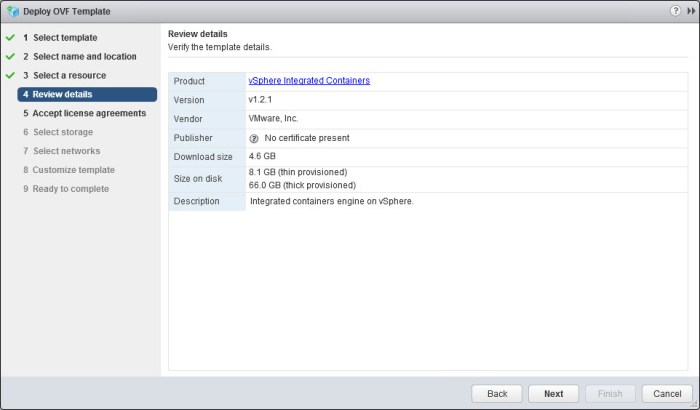
- Review the details of the appliance and click Next.
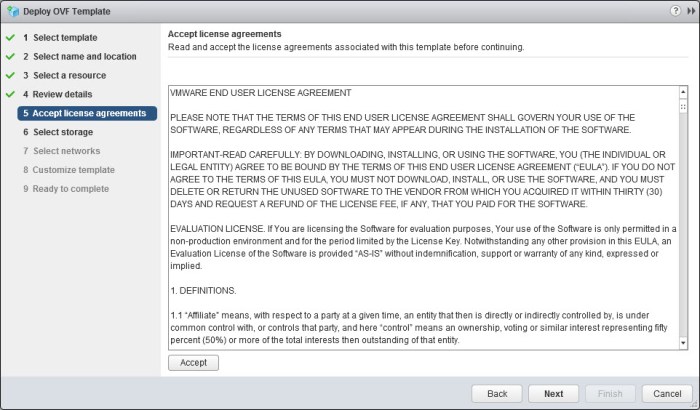
- Accept the license agreement and click Next.
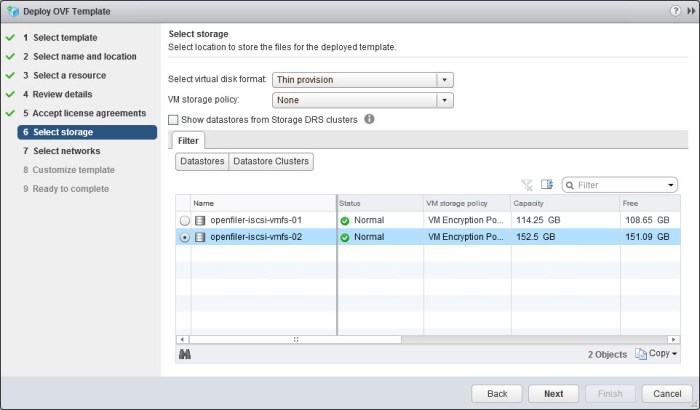
- Select your target datastore and click Next. If you intend on using Thick Provisioning for the management appliance make sure your datastore has enough free space! I’m in a lab environment and intend on using Thin Provisioning.
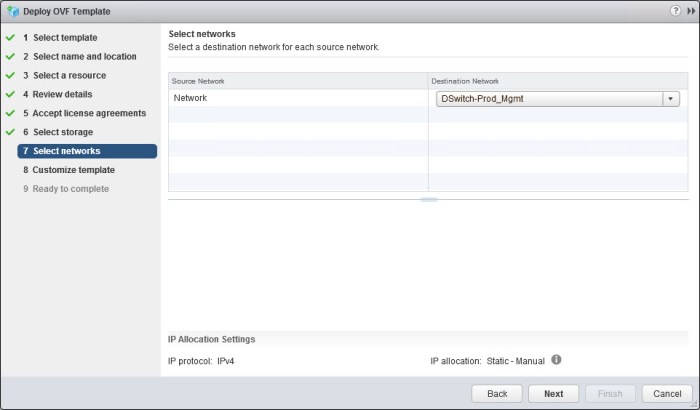
- Select the target network and click Next. I have a management distributed port group in my environment that I will be using which happens to be the same network segment where my VCSA is located.
- The Customize Template window has a lot of information to be entered into various dialog boxes. Enter the appliance root password and check off enable SSH. Enter the network properties that you have planned for your appliance. It will ask for the appliance FQDN in section 2.6. There are several sections including Registry Configuration, Management Portal Configuration, Fileserver Configuration, Demo VCH Installer Wizard Configuration and lastly Configure Example Users. Configure these settings according to your needs but more importantly MAKE NOTE and DOCUMENT these settings. If you intend on using self-signed certificates then simply leave those dialog boxes blank. They will be generated during the installation. Change the password for the ‘vic’ example user account. The default password is VicPro!23. Change it!

Default Ports for the VIC Appliance:Registry Port 443
Notary Port 4443
Management Portal Port 8282
Fileserver Port 9443
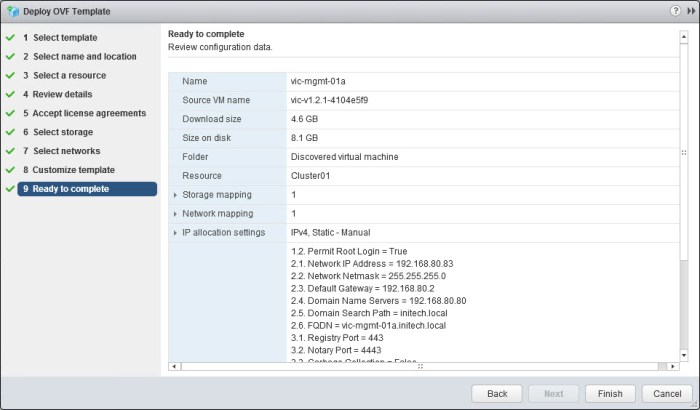
VCH Engine Install Wizard 1337 - Review everything in the Ready to Complete page and click Finish. The appliance deployment will begin. Monitor the import of the OVA appliance from the vSphere Web Client.
Wait patiently for the appliance to deploy and once it is complete manually power on the VM appliance and monitor it closely. Open a VM console and upon a successful boot you will see the following.
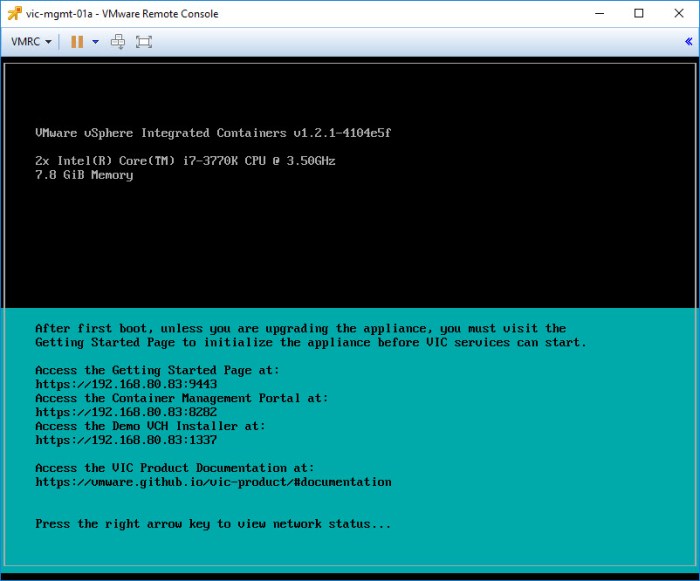
Completing the Appliance Deployment
Next we are going to initialize the appliance. Open your web browser to the following URL and accept the certificate. The moment you accept the certificate you will see the following in your browser. Enter in the necessary information for vCenter Server and the PSC and select Continue. I am using an embedded PSC so I will enter the same FQDN in here twice. This is a LAB environment that I am using. In a “real world” situation I would most likely be using an External PSC Instance just as it is prompting for in the screenshot below.
https://<appliance-fqdn>:9443/

Install VIC Client Plug-ins on VCSA
Now the the appliance is deployed in our environment we are going to install our VIC client plug-ins by logging into our VCSA and executing a script. What does this script do? It registers an extension with vCenter and instructs it to download the plug-in files from the file server component of our VIC appliance. This installer will place a ‘basic plug-in’ for the vSphere Web Client and also a plug-in with more complete functionality in our HTML5 client on our vCenter 6.5 Server.
Make sure you have Putty available on your system for the next steps.
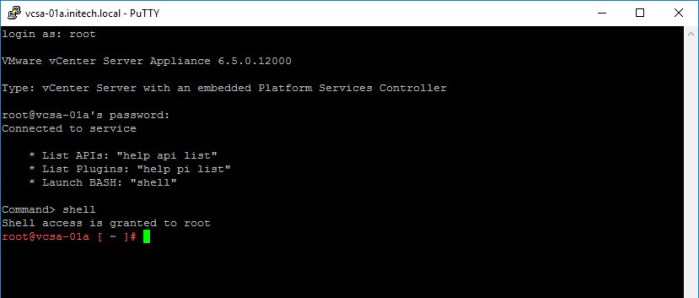
- Connect to your VCSA appliance (not the VIC appliance) using the root account. Once authenticated type the ‘shell’ command and press ENTER.
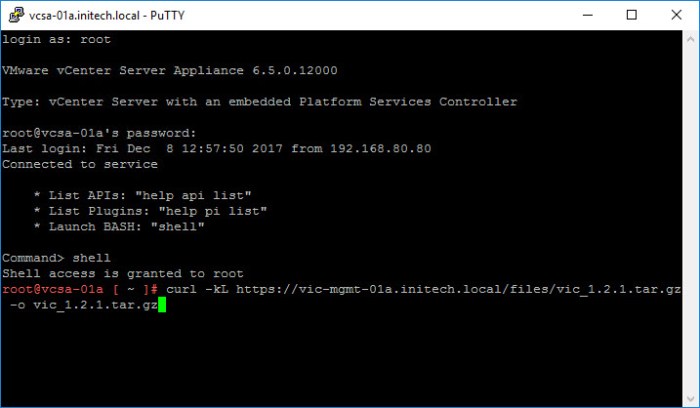
- Next we are going to use the ‘curl’ command to copy the VIC binaries from the VIC appliance into the vCenter appliance. Execute the following command and press ENTER in your Putty session:
$ curl -kL https://<vic-fqdn-or-ip-address>:9443/files/vic_1.2.1.tar.gz -o vic_1.2.1.tar.gz
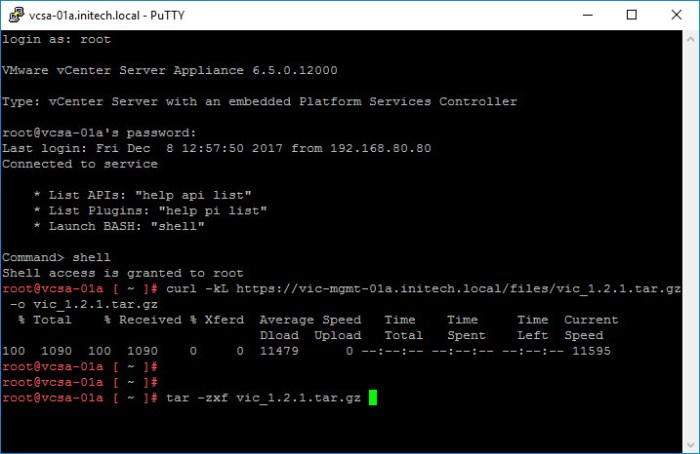
- Next we need to unpack the VIC binaries. Execute the following command.
$ tar -zxf vic_1.2.1.tar.gz
- Next navigate to the /vic/ui/VCSA directory to run the installer script and follow the prompts.
$ cd /vic/ui/VCSA
$ ./install.sh

- You will be prompted for several things regarding vCenter including the IP address, the vCenter admin account/password and lastly accept the certificate thumbprint. Once you have entered and verified all of that information simply wait for the install to complete.

- Verify that you have a successful install.
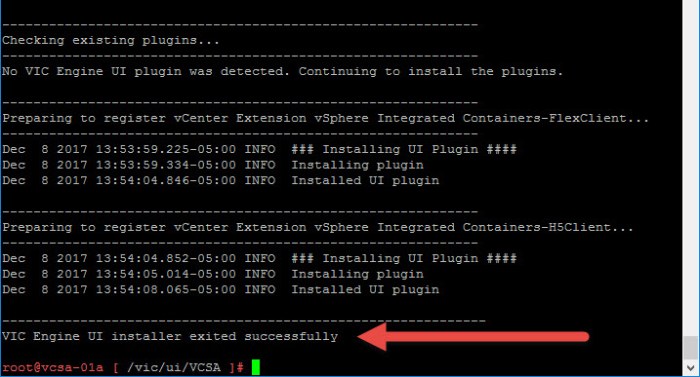
- Lastly we need to stop and start the vsphere-client service on our VCSA. Execute the following command to accomplish this. The first command is used to restart the HTML5 Client Service and the second is used to restart the Flex–based Client.
$ service-control --stop vsphere-ui && service-control --start vsphere-ui
$ service-control --stop vsphere-client && service-control --start vsphere-client
- Lastly verify that the Virtual Container Host (VCH) plug-ins are available in the vSphere Web Client (flex-based) and the HTML5 client. The plug-in the HTML5 client is more feature-rich than the Flex-based client.
REMINDER: The HTML5 client is only available in vSphere 6.5.
Open Firewall Ports
The last thing I’m going to do here is open up some firewall ports on my ESXi hosts. The ESXi hosts must be able to communicate with the VCH (Virtual Container Hosts) through port 2377 over Serial Over LAN. We are going to accomplish this by running a command on our local machine.
First we must download the vSphere Integrated Containers Engine Bundle from our newly deploy VIC appliance and then unpack it on our machine. I’m using a Windows 10 desktop and I also have 7zip installed locally.
Download the VIC Engine Bundle from the following URL:
https://<vic-appliance-fqdn-or-IP-address>:9443/
From there you can download the bundle from the download hyperlink in the lower right hand corner.

Once you have it downloaded and extracted on your local system, browse to the directory of the bundle from a command prompt. I executed the –help parameter for you so you can see some of the options we are going to use with our next command.
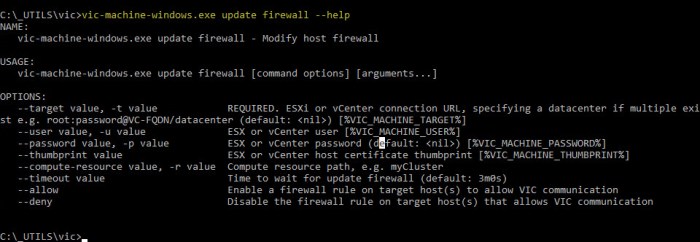
We are going to supply parameters for several options that you see listed. Simply enter the follow command to open the firewall ports on the ESXi hosts in a specific vSphere Cluster. So make sure you have your vSphere cluster name ready to go here. My cluster uses a simple name…Cluster01. Again, I’m executing this command from my Windows 10 workstation.
$ vic-machine-windows.exe update firewall --target 192.168.80.81 --user "Administrator@vsphere.local" --password VMware1! --compute-resource Cluster01 --thumbprint 0E:E9:4A:BF:B7:29:C5:DE:44:93:C5:FF:BF:E2:86:D9:8C:9F:56:79 --allow

TIP: A quick method I used to get my thumbprint was execute the command without the –thumbprint parameter. This caused the command to FAIL. But the output from the failure supplied me with the thumbprint that I needed to complete the successful command above.

The other method to obtain your VCSA thumbprint from the command-line is by executing the following command:
openssl x509 -in /etc/vmware-vpx/ssl/rui.crt -fingerprint -sha1 -noout
Conclusion
That’s pretty much all there is to it for deploying and doing some initial configuration of vSphere Integrated Containers (VIC). Read the deployment documentation thoroughly before starting your own deployment. That’s the best advice I can give you with this one. I did have some odd issues with the VCH plug-ins not appearing in vCenter initially but then they just showed up. So be patient.
Some of the next steps beyond the initial deployment will include deploying what is known as the Virtual Container Hosts (VCH). The command vic-machine create is used to deploy the VCH’s and also allows you to customize them to meet your development requirements.
You can find out more about the deployment above and deploying VCH’s in the VIC Documentation Link below.
I’ve enjoyed working with VIC quite a bit and can’t wait to explore this area even further in the coming months. Good luck and hope this deployment guide helps you out a bit!
Useful Links
Install, Deploy & Maintain vSphere Integrated Containers (version 1.2)
vSphere Integrated Containers Support Documentation Homepage
vSphere Integrate Containers Products Homeage (VMware)
vSphere Integrated Containers Hands-on Lab
VIC Deep Dive – Hacks, Debugging & Demos from VMworld 2017 (with Benjamin Corrie) – YouTube Video
