In this quick step-by-step “how to” blog post I am going to demonstrate how fast and easy it is to set up the vCenter Server Appliance (vCenter w/ Embedded PSC) onto a new vSAN host. Once the appliance is deployed the vSAN configuration for the remaining hosts will be added to my cluster. You may have seen this done manually in the past a few times. You can find it if you Google search ‘bootstrap VCSA’ and review some of those cool articles that are out there. The ‘bootstrap’ method is native to the installer since the release of the 6.5 appliance.
Once you have downloaded the ISO for the VCSA appliance, mount the ISO image and simply launch the ‘installer.exe’ found in the ‘vcsa-ui-installer\win32\’ directory. Aside from having a hostname and static IP address my ESXi hosts have not been configured with anything else. All of the local disks in my ESXi host are unclaimed.
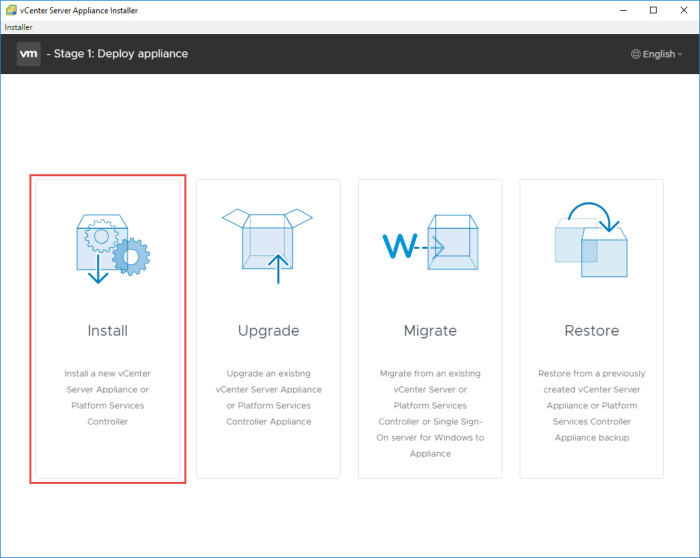
- The installer will initiate and then click the Install option.
- Click Next on the Introduction page.

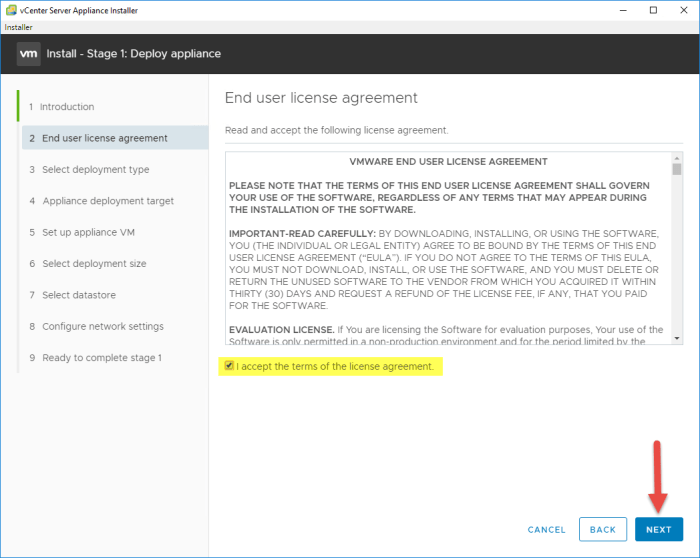
- Accept the EULA and click Next.
- Select the Embedded Platform Services Controller option and click Next.

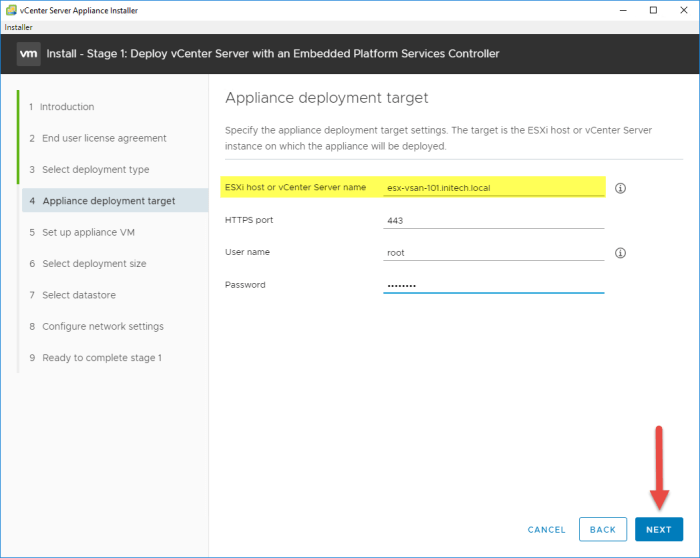
- Enter the ESXi deployment target information and click Next. Click YES to accept the certificate warning.

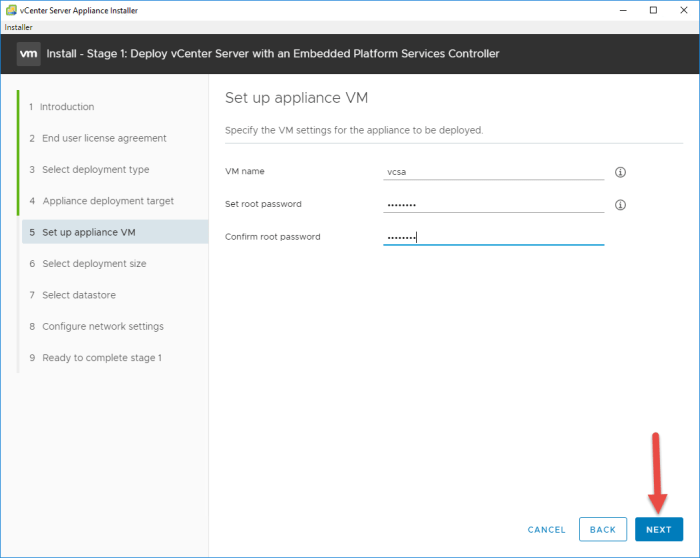
- Enter the name of the appliance as you want it to appear in the vSphere inventory and provide a complex root password. Click Next.
- Next choose the Deployment size. Reference the sizing chart to determine which size you need to deploy to support your infrastructure. Click Next.

- Select the ‘Install on a new vSAN cluster containing the target host’ option and then enter a name for the new virtual datacenter and cluster. Don’t worry you can change these names later if you cannot decide on one now. I am leaving the default for now. Click Next.

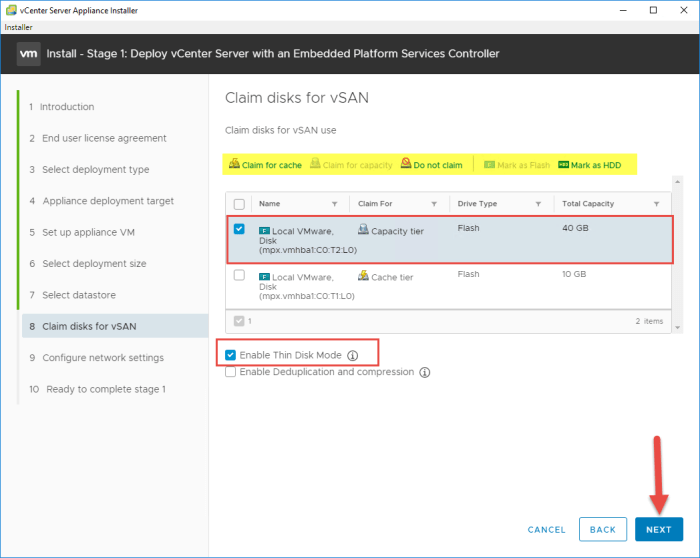
- Next you will need to specify which disk(s) are to be used for Capacity. If you have all SSD like I do in my lab here then everything will appear as ‘Cache Tier’ by default. Simply select the disk (or disks) and then select the ‘Claim for capacity’ option. I enabled Thin Disk Mode for my deployment because I am working with small disks in my nested ESXi environment. Click Next.
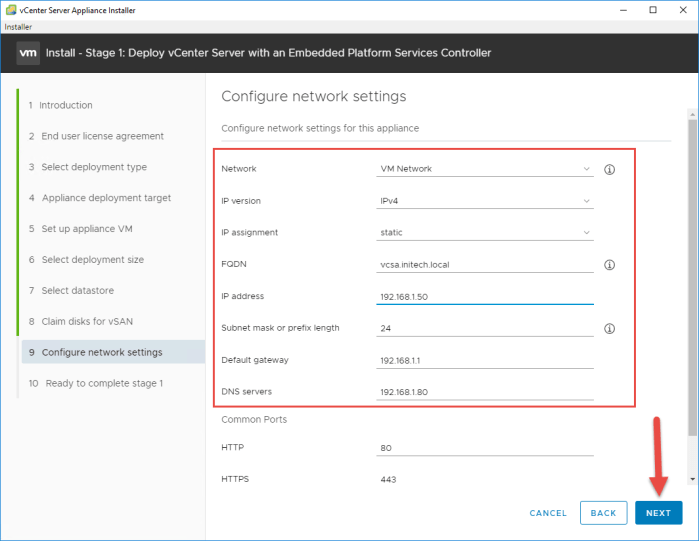
- Next specify the network settings for your appliance and click Next.
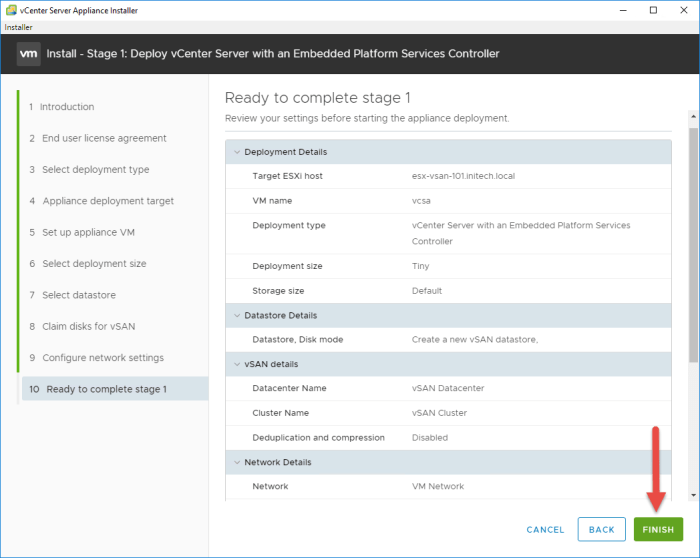
- Review the settings you specified during the wizard and click Finish when you are ready. The deployment of the appliance will begin.
- Monitor the deployment process for the appliance. If you have deployed the VCSA in the past you will quickly notice deployment is much faster in 6.7. At the completion of ‘Install – Stage 1’ you will then click Continue.
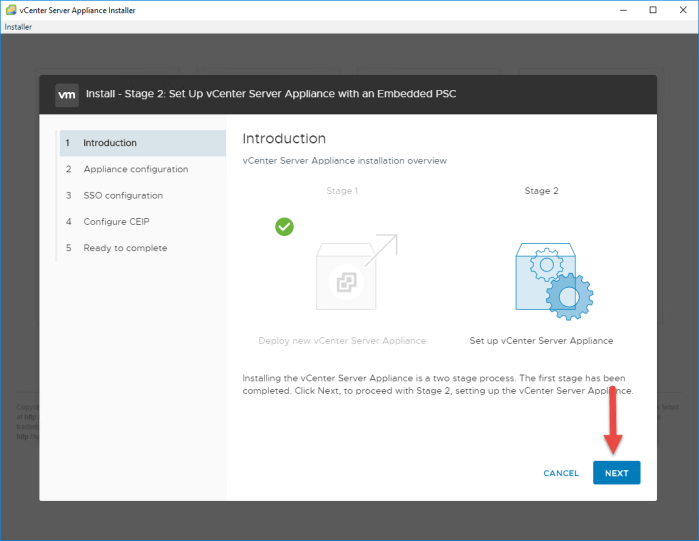
- After you click Continue the ‘Install – Stage 2’ phase of the deployment will begin. Phase 2 deals primarily with the configuration of the appliance now that it has been deployed. Click Next on the Introduction page.
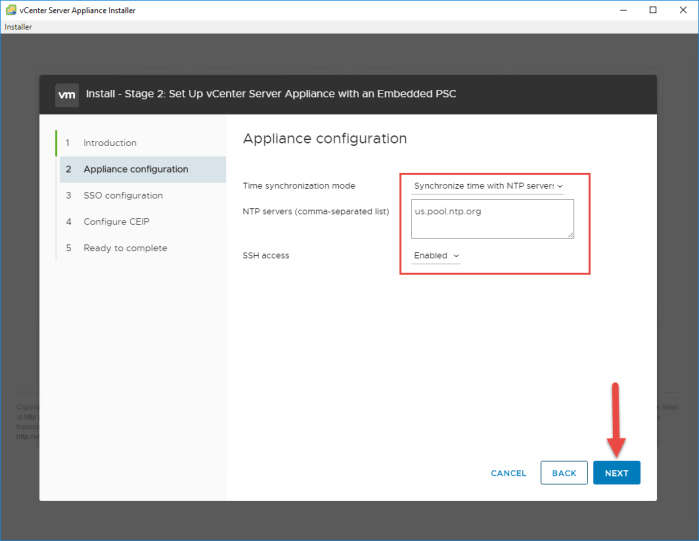
- On the Appliance Configuration page select the time synchronization mode and SSH access option suitable for your needs. I’ve chosen to sync my time with NTP servers and Enabled SSH access for my appliance. Click Next.
- On the SSO Configuration page specify whether you want to Create a New SSO domain or Join an existing SSO domain; specify the one that fits your deployment needs. I’m creating a brand new SSO domain in this example. Click Next when ready.

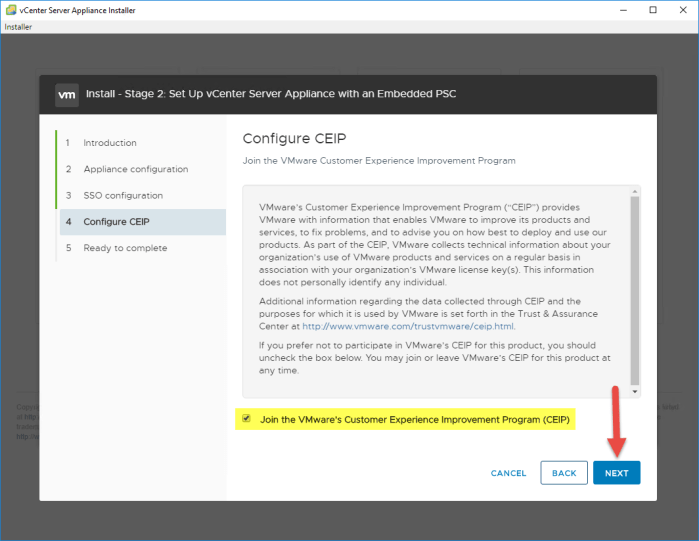
- Choose whether or not you want to join VMware’s CEIP program and click Next.
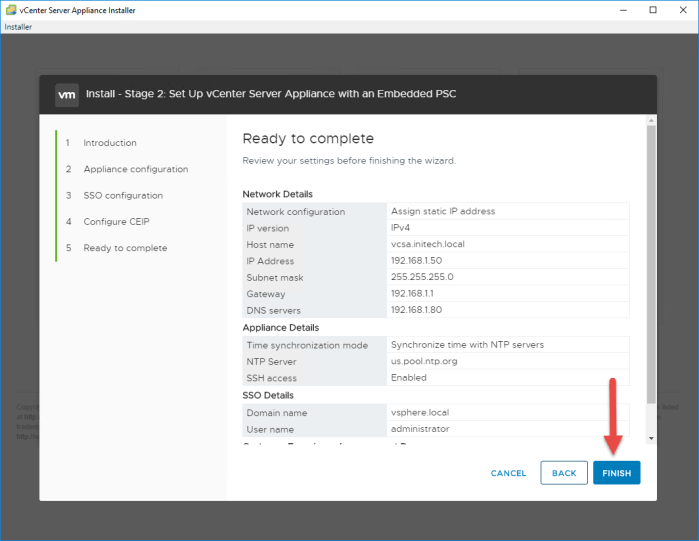
- Review the information on the Ready to complete screen and click Finish when you are ready. Configuration of the appliance will begin. You will receive a warning that you will not be able to pause or stop the install. Click OK to continue.
- Monitor the configuration process of the appliance. It will take a little time so be patient.
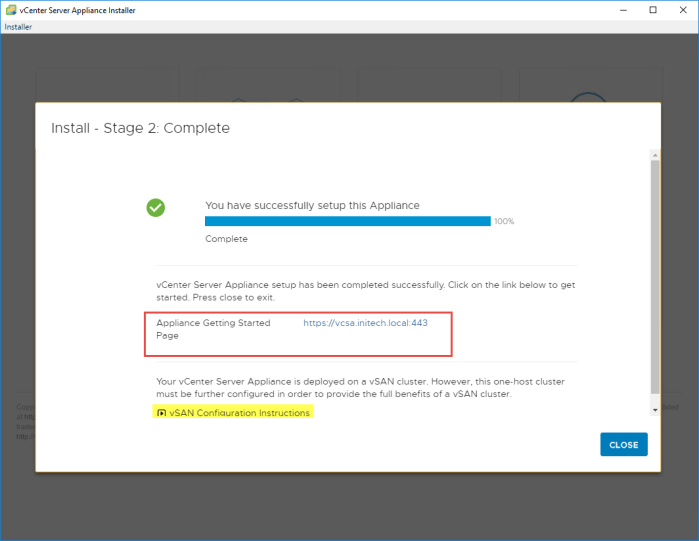
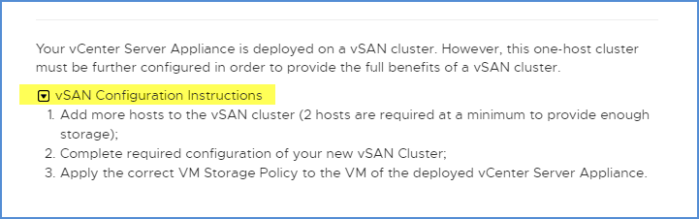
- When the configuration is complete you will see a link to your newly deployed and configured VCSA appliance and also a set of instructions for completing the setup of vSAN. Review those instructions. Click Close.
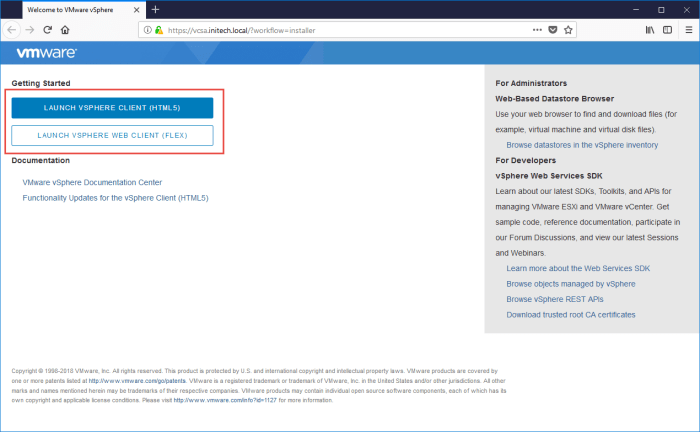
- Accept the default certificate and the new Getting Started page for the VCSA appliance will appear. As you can see you have the option of using the HTML5 or FLEX client options. I am going to use the HTML5 client.
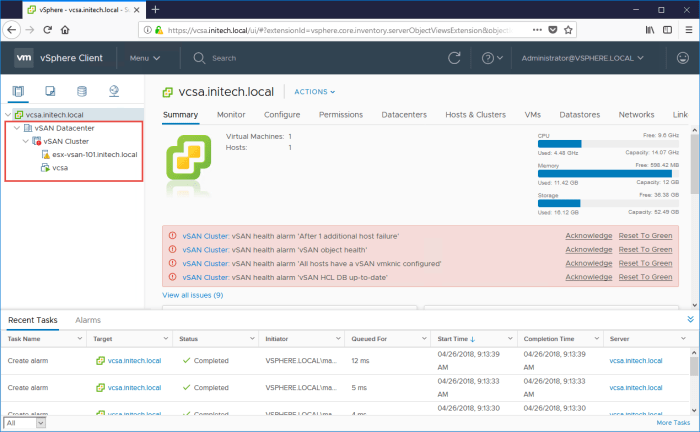
- Log into the HTML5 client with your SSO administrator credentials that you specified during the configuration of your new appliance. Once you are logged in your vSphere 6.7 inventory should look something like this from Hosts & Clusters. Yes you will see some ALARMS associated with vSAN. This is completely NORMAL so remain calm. The remaining hosts have not been deployed in the cluster yet and therefore all these alarms are being tripped at the moment. (Don’t forget your licensing!)
As far as my next steps go for vSAN I would proceed with configuring everything required for my vSAN cluster including (but not limited to)…
- Add the remaining vSAN hosts to the cluster.
- Configure a dedicated vSAN vmkernel on each host.
- Add the disks from the additional hosts to the vSAN disk group(s).
- Once everything is up and running make sure you run your vSAN Health Check and do not ignore the errors if you have any!
Use the documentation links that I provided below if you are unfamiliar with this process or need a refresher.
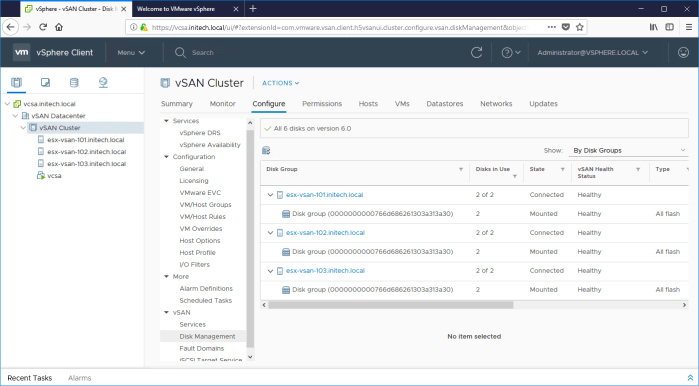
Here is my simple 3-node vSAN 6.7 cluster once I was finished!
Also be sure to take a look at the new Backup Schedule feature for the VCSA. Log into the appliance ‘https://<vcsa-IP-or-hostname>:5480/’ and take a look. The supported protocols are FTPS, HTTPS, SCP, FTP and HTTP. I point this out because as soon as you’re finished deploying your new VCSA you should get a backup of it ASAP 🙂

Useful Links
vCenter Server Installation and Setup – vSphere 6.7 and vCenter 6.7 (PDF)

Ive tryed this several time now, and I am challenged with this solution, because post installation, a Datacenter and a Cluster is never created. I can create it post, but then there are problems importing a host with vsan into a cluster which as such has a new vsan.
Do you know the reason why I would’nt get a datacenter and cluster created uring installation?
LikeLike