VMware vCenter HA (VCHA) was a feature first introduced in vSphere 6.5 back in late 2016. There is two deployment methods available when enabling this feature…Basic deployment or an Advanced deployment. The Basic deployment method is the easiest of the two. The procedure did everything for you including…
- Added 2nd NIC to the vCenter VM.
- Cloned the vCenter VM to create the secondary and witness appliances.
- Resized the Witness VM.
- Created the DRS anti-affinity rules.
If you chose the Advanced VCHA deployment you had accomplish all of these tasks manually. The downside of the Advanced method was if you had to change something in the configuration such as a static IP address for vCenter, change the certificates or worst of all had to restore vCenter…you had a lot of work to do before your VCHA cluster was back running in its intended state. Basic VCHA would have everything back and online in a few minutes. So if you’re looking for the PROS and CONS between Basic and Advanced VCHA, there you have it.
What’s great about VCHA 6.7? You no longer need to decide between Basic or Advanced. There’s one option…you either enable it or you don’t. Pretty straightforward right? When you enable VCHA in 6.7 it uses the Basic workflow. The Advanced option is no longer available so no more manual work!
In this blog article I am going to take you through the step-by-step procedure to get your VCHA 6.5 cluster running VCHA 6.7 U1.
Current VCHA Deployment
First let’s do a quick review of my VCHA 6.5 deployment in my lab and get into some specifics. I have three (3) ESXi hosts running in a nested management cluster (vSAN enabled). VCHA 6.5 has been deployed using the Basic option. Here is a summary of the version (build #’s) that I am using; 100% VCSA, no Windows Servers!
- vCenter Server 6.5 U1 – Build 8024368
- ESXi 6.5 U1 – Build 10175896
Always correlate your build #’s for your environment properly. Bookmark the following KB article in your web browser for a quick reference.
Correlating build numbers and versions of VMware products (1014508)
IMPORTANT: Be very careful with upgrading or applying any patches to your vSphere 6.5 environment; specifically vCenter Server in this case. If you refer to the ‘Interoperability Matrices / Upgrade Path’ webpage for vCenter Server you will find the following information noted for 6.5 U2 to 6.7 U1.
“For vCenter Server 6.7.0 onwards, applies to vCenter Server as well as to Update Manager Upgrade from 6.5 patches post 6.5 U2, dated November 2018 or after, to 6.7 U1 are unsupported as it is considered back-in time.”
What does this mean? If you upgrade your vCenter Server to version 6.5 U2, you will not be able to upgrade to vCenter 6.7 U1. You’re most likely in a situation where you will need to wait until 6.7 U2 is released before upgrading (that would be my safest assumption considering 6.7 U2 is not available yet). So if you are planning on upgrading to 6.7 U1 in the near future, avoid 6.5 U2 as you will be in a temporary holding pattern for getting to 6.7 U1. My recommendation is to remain on 6.5 or 6.5 U1 and proceed to 6.7 U1 from there. Being a VMware employee, I can say we are working to avoid these “back in time” releases in the future.
Prior to upgrading my VCHA appliance I executed a backup in the event I need to restore due to any failure. Make sure you perform a backup! At a minimum take advantage of the native backup capabilities of the 6.5 appliance by navigating to the Appliance Management page of the appliance and follow the wizard for running a backup. If you have another means of performing a full backup of your vCenter Server appliance then by all means make sure you do so.
The URL for the management page to perform a backup from the appliance is:
https://<vcenter-appliance-FQDN-or-IP>:5480

After I complete my backup I append ‘_OLD’ suffix to the end of my vCenter HA VM in the inventory. The reason I am doing this is because I want my newly upgraded environment to use the original name. I’m only modifying how the VM is named in the inventory, the actual FQDN of the appliance is not being changed.

Upgrade VCHA
Let’s begin the upgrade process! Follow the step-by-step procedure to upgrade the VCHA 6.5 U1 appliances to VCHA 6.7 U1. Everything is backed up and ready to go. Let’s review a couple things real quick.
First, depending on how you have your cluster configured you need to make sure the virtual appliances are not vMotion’d to another host during the upgrade. You can either temporarily disable DRS at the cluster level during your upgrade or create a VM override rule to disable DRS for the 3 appliances associated with your VCHA deployment.
Last thing is a high-level overview of the process. There are two (2) stages during the VCSA upgrade. During Stage 1 the new virtual appliance is deployed in parallel with the existing vCenter appliances. You will need a temporary static IP address from the same network segment where your current vCenter Server exists so make sure you reserve one that is 100% available. During Stage 2 of the procedure is the final cut-over from the old appliance to the new appliances. The data is copied from source to destination and then imported into the new DB; the old vCenter appliance is then powered down. Things will wrap up when the peer and witness appliances post upgrade tasks take place and the VCHA cluster is restored to normal operations.
NOTE: I am using the ISO image VCSA 6.7 U1b – Build 11726888 (Released on 2019-01-17).
Step-by-Step Procedure
- Select the Upgrade option from the installer.

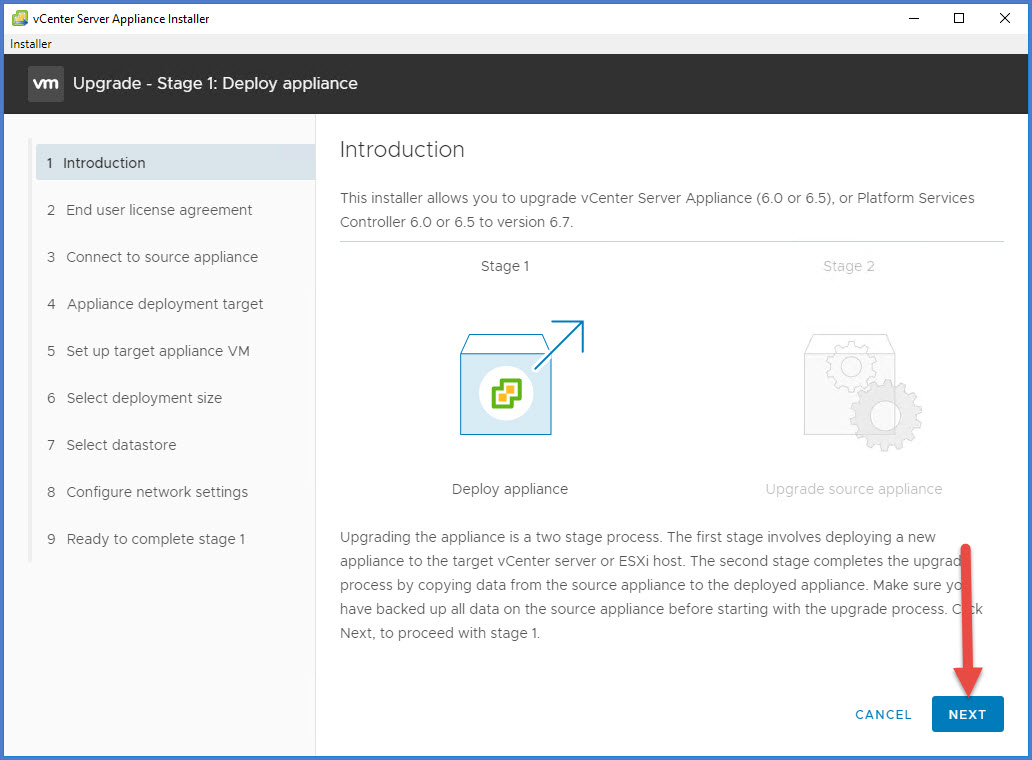
- Click Next on the Introduction.
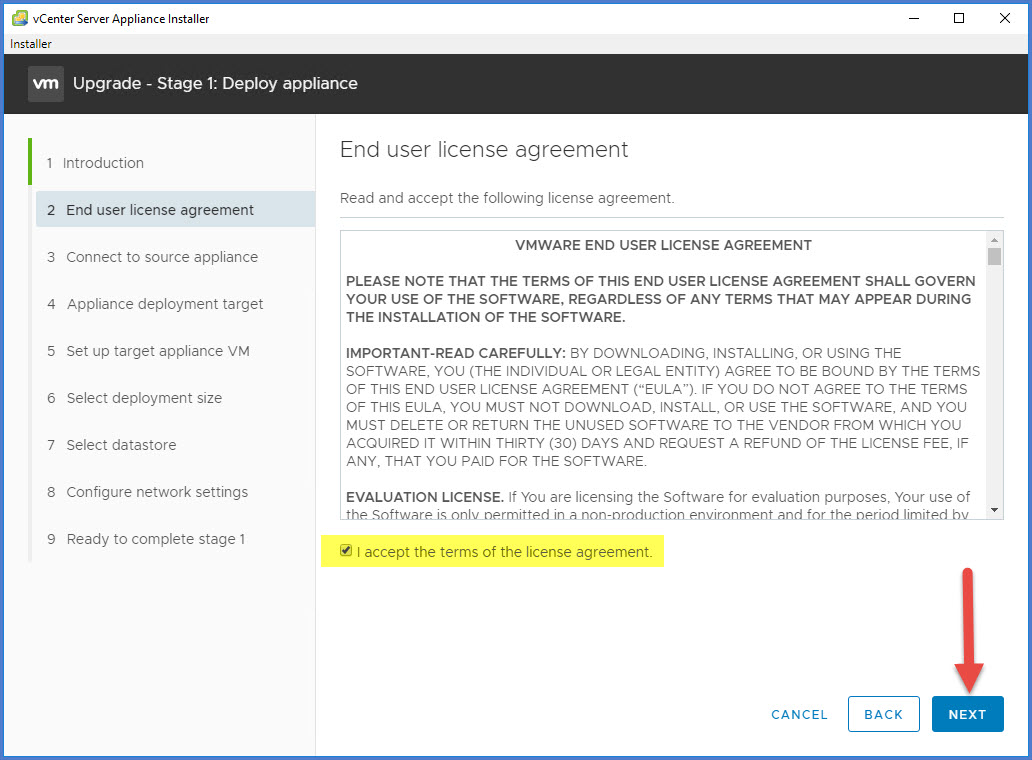
- Accept the EULA agreement and click Next.
- Next I am going to enter the FQDN (or IP address) of my source vCenter Appliance and then select Connect to Source. The installer will connect with your active vCenter Server appliance and the prompt you for additional information. For the source appliance you will provide the SSO user name and password followed by the appliances ‘root’ password. Then provide the ESXi host or vCenter Server that manages the source appliance. If you enter the ESXi hostname (or IP address) where your vCenter Server currently resides and hit next you will get an error message that will state ‘Since the source appliance has VCHA enabled, you must provide details of the vCenter Server that is managing the source appliance instead of the ESXi host.’ So in the bottom half of the window make sure you enter the FQDN of your active VCHA appliance as you see in my screenshots. Click Next and then click Yes to accept the certificate warning. The installer will validate your settings and then you will see a pop up that states ‘VCHA enabled on source appliance’…click Continue.
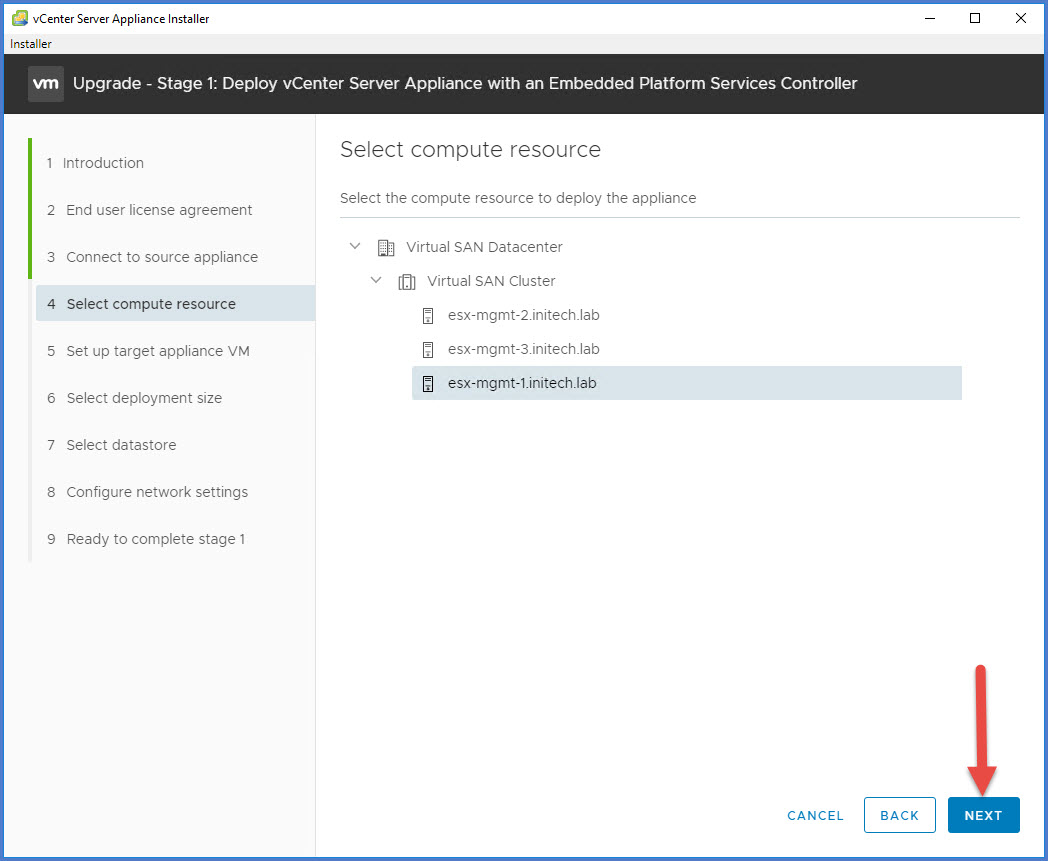
- From the select compute resource window, choose an ESXi host where you want to deploy the new appliance and click Next. I selected the same host where my active appliance is deployed.
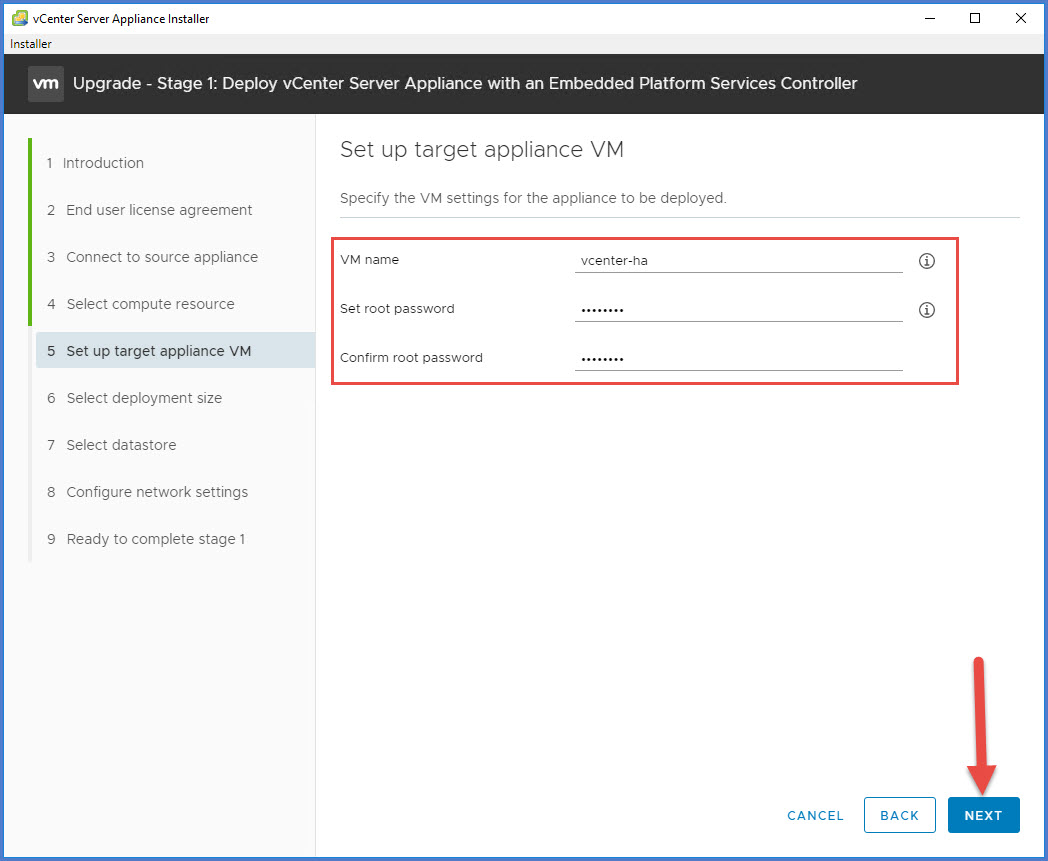
- On the Set up target appliance VM window I enter the name of the appliance for how it will appear in the VM inventory. This is why I appended ‘_old’ on my appliances prior to upgrading because I want my newly deployed appliances to take on the original names during deployment. Set the root password and click Next.
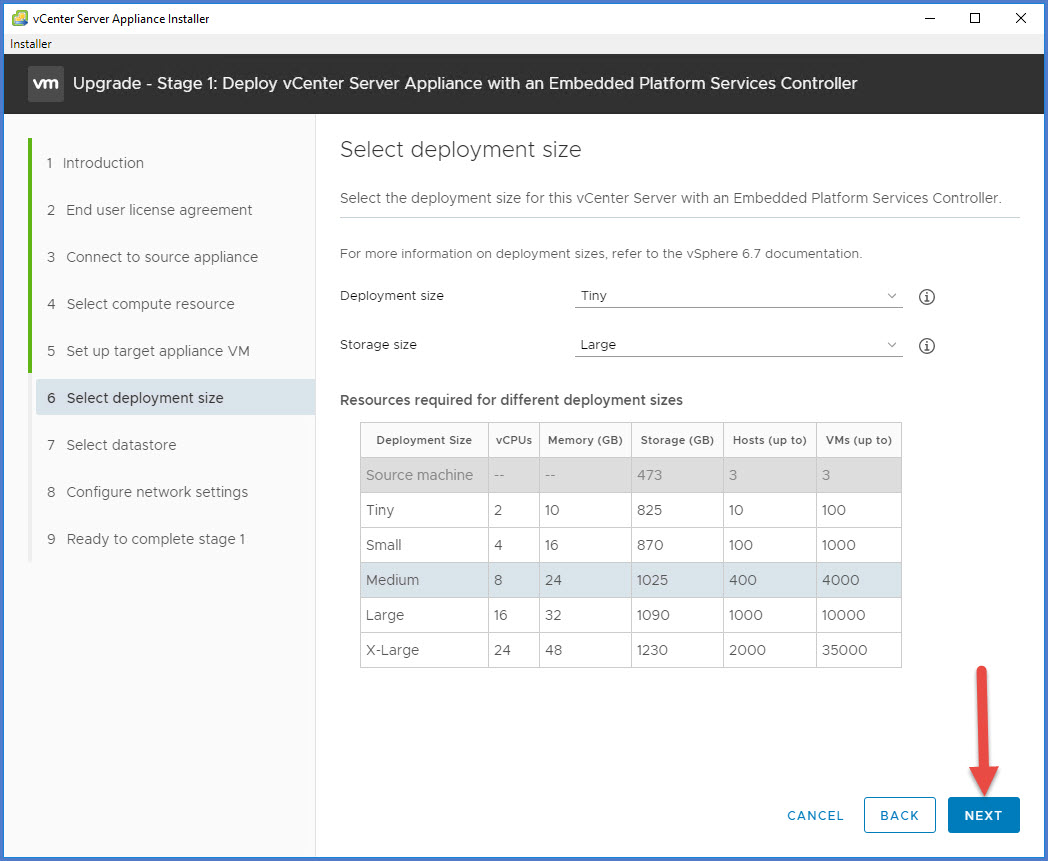
- Select the deployment size for your environment and click Next. I use the Tiny option for my lab.
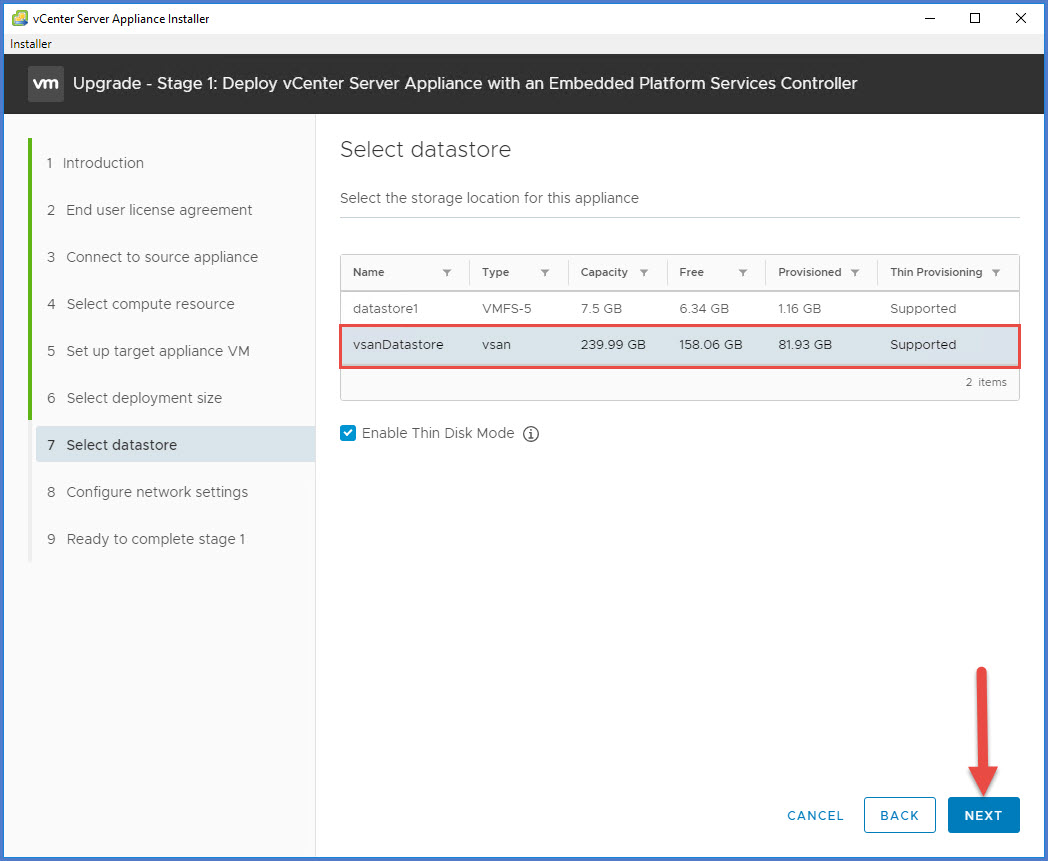
- Select the target datastore and click Next. I am using VMware vSAN for my small management cluster so here you can see I have selected my ‘vsanDatastore’ for my deployment.
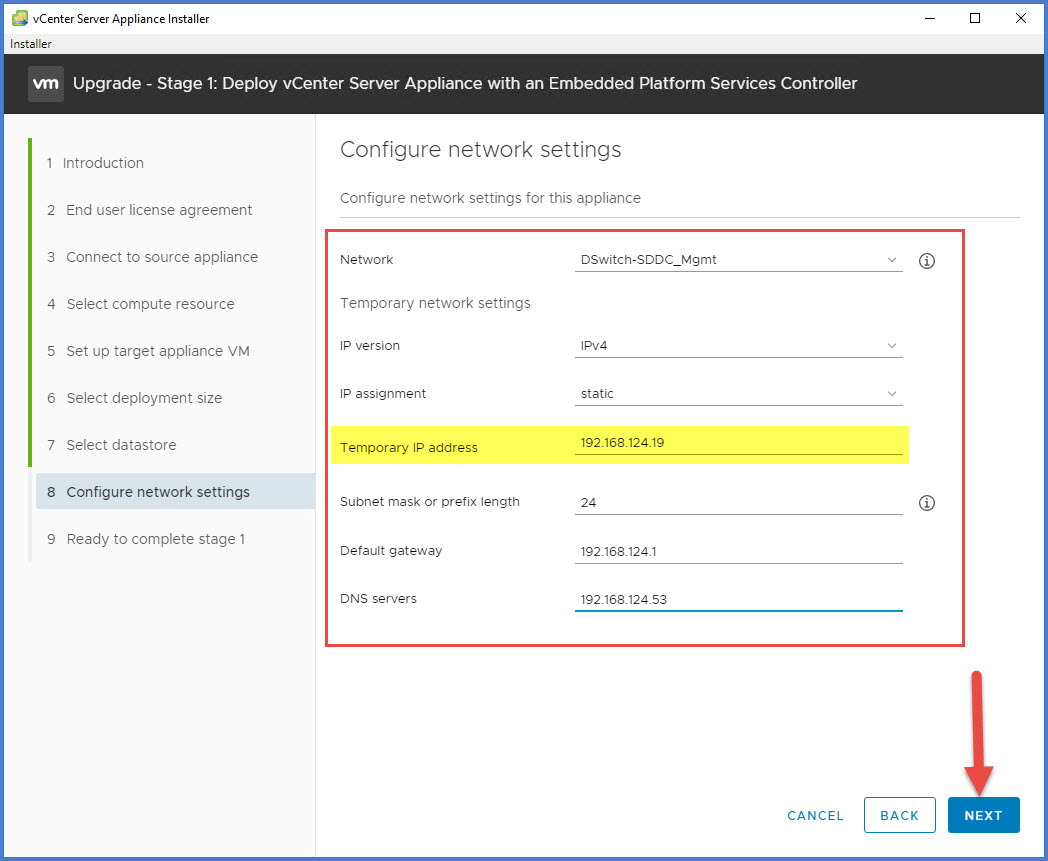
- Next you will enter the network settings to be used by the new appliance being deployed in Stage 1 which will run parallel to the existing VCHA appliances. This is where you will enter the ‘temporary IP address’ that you should have procured during the planning phase. Enter the necessary information including the correct network (port group) and Click Next.
- Review the settings applied during the wizard and click FINISH once you are ready to begin Stage 1 of the deployment.

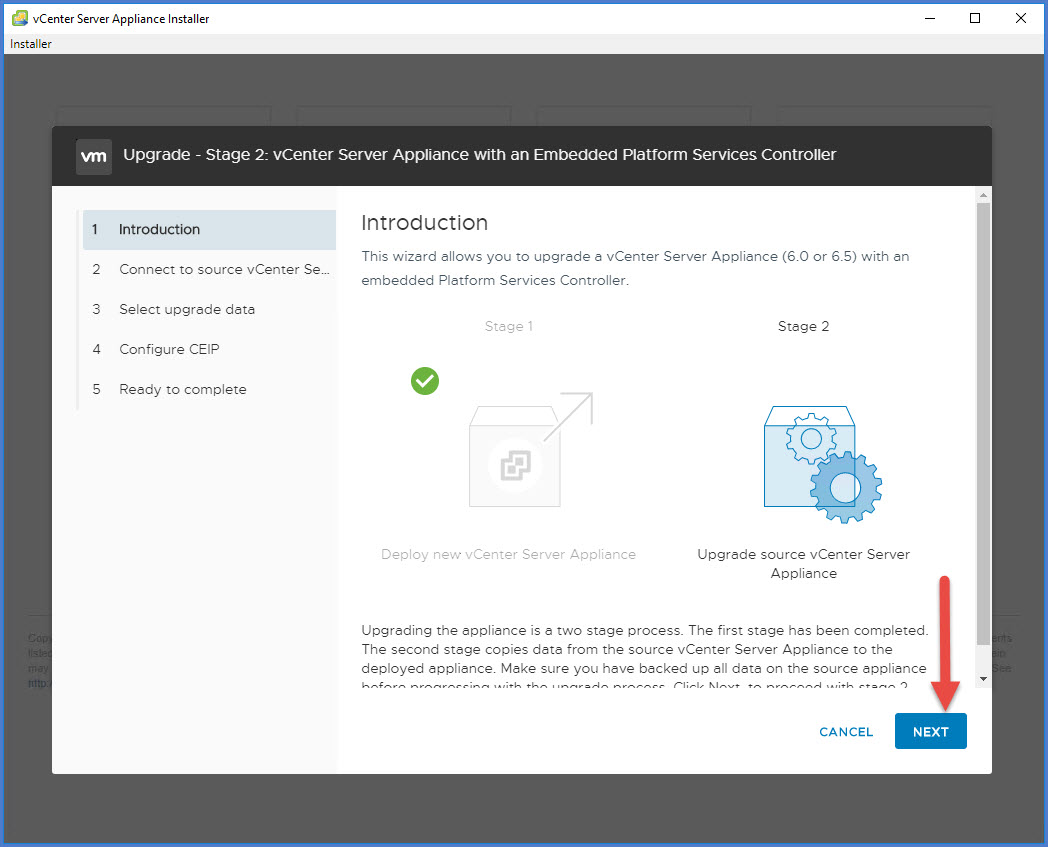
- The ‘Upgrade – Stage 1’ process will initialize and begin by deploying a new VCSA 6.7 appliance in your cluster. Keep a close watch on the process. When the deployment completes you will hopefully see a screen/window like this. Click Continue to to proceed with ‘Stage 2’ of the process.

- The window will quickly refresh and log into the new appliance. Click Next on the Introduction window.
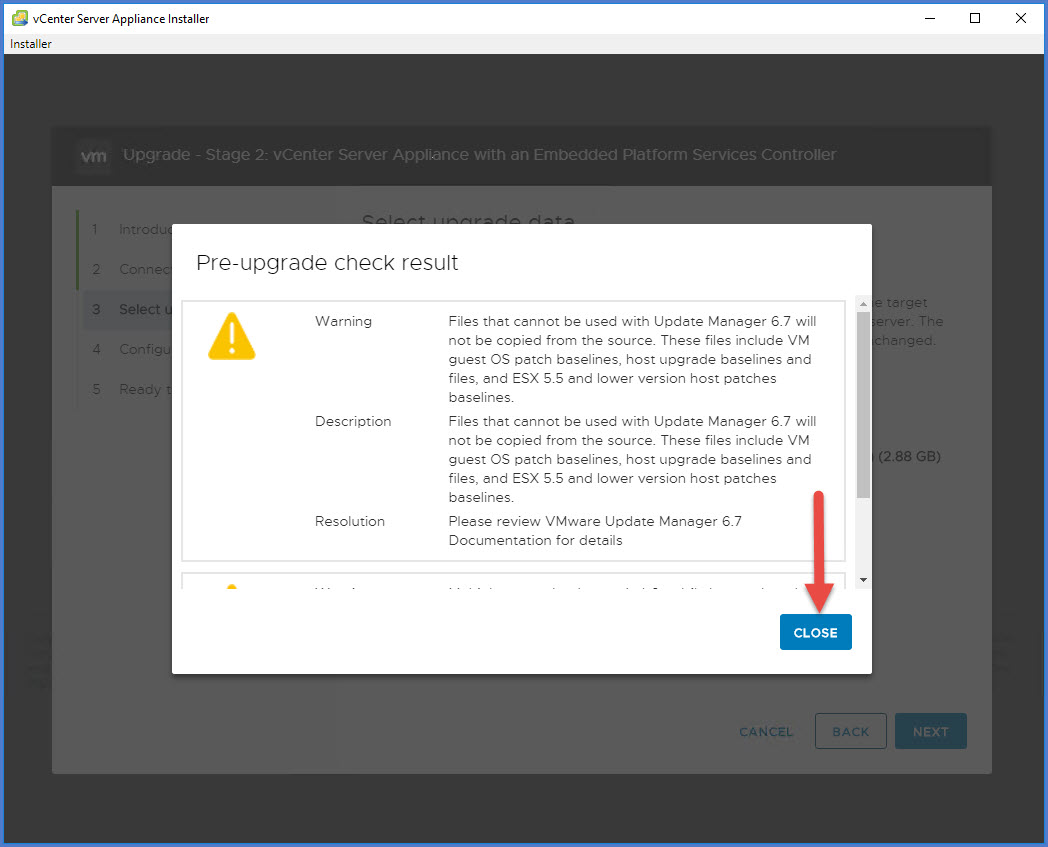
- A pre-upgrade check will take place prior to proceeding. Be patient here as this could take a few minutes to complete. When the pre-upgrade completes you will see the results of of the pre-upgrade check. Make note of any Warning messages. If there are any critical warnings you will not be able to proceed. Click Close.
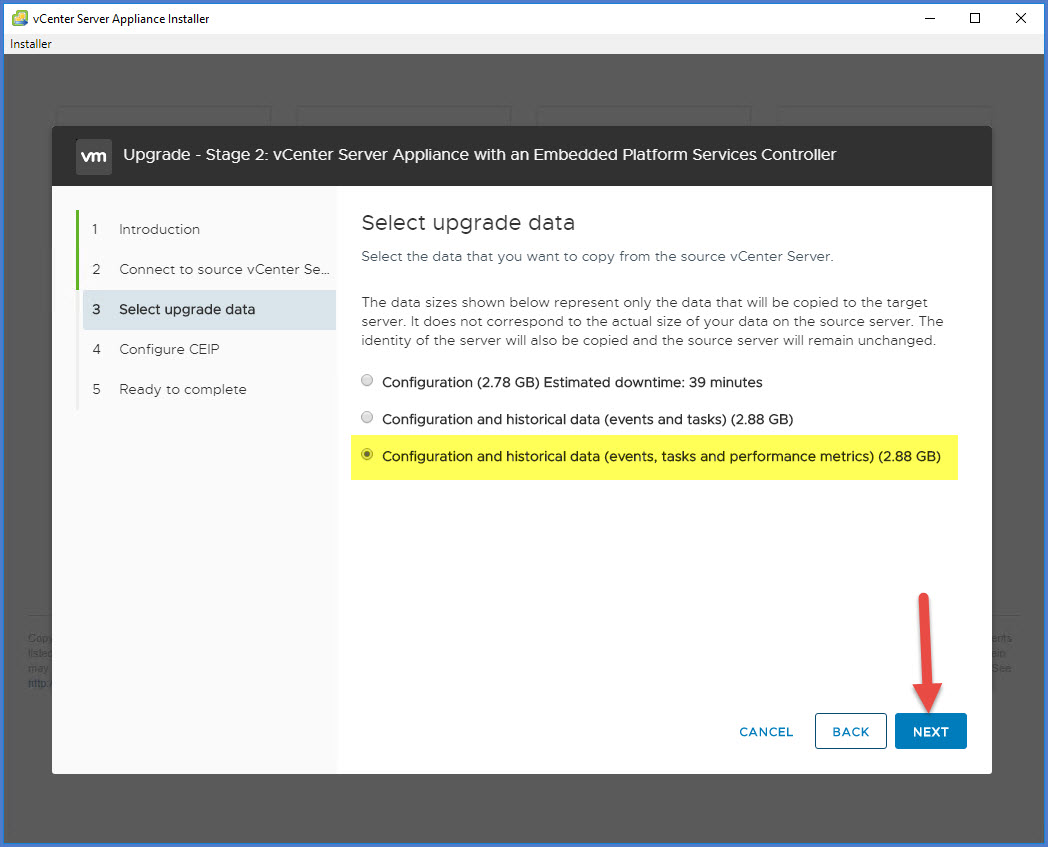
- In the Select upgrade data window you will choose how much of your data will be transferred from the source virtual appliance over to the new (target) virtual appliance. My lab environment does not contain much data so I’m going to choose the option highlighted below. Keep in mind, if you are a large enterprise environment it will take some time to transfer all of the data over so be patient. Click Next.
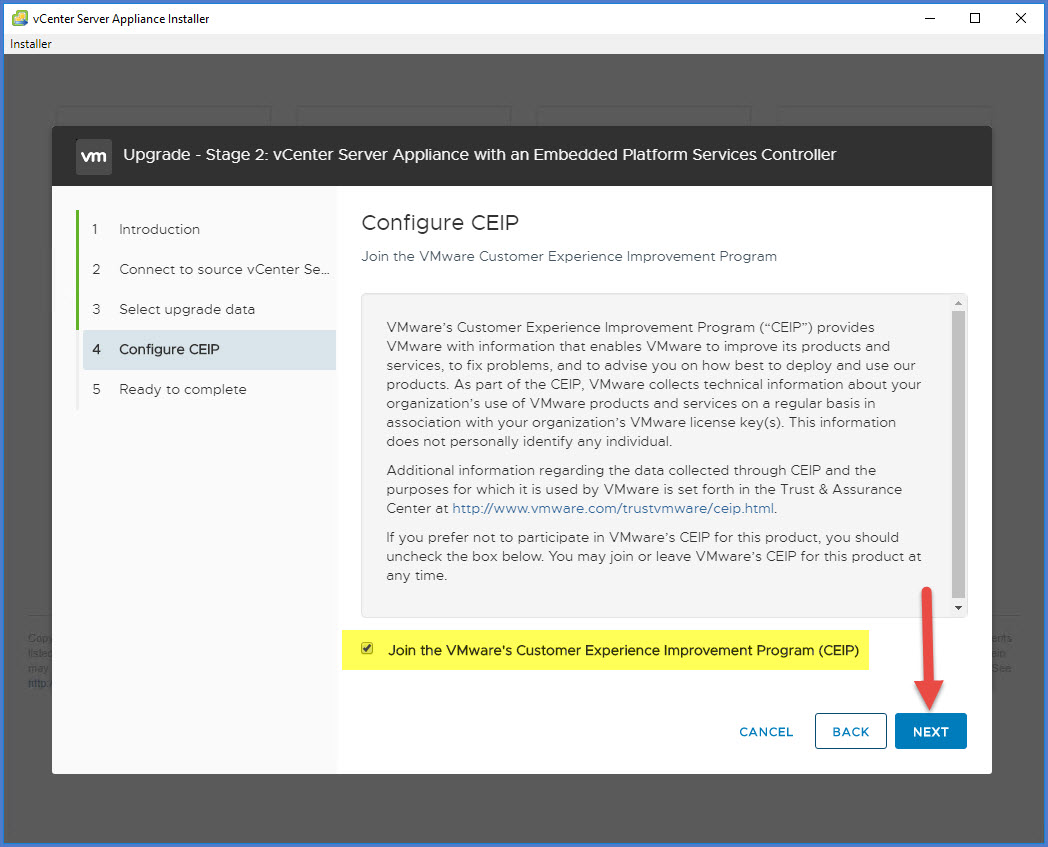
- OPTIONAL: Select the ‘Join CEIP’ and click Next.
- Review the Ready to complete window and select the box confirming that you have backed up your source vCenter Server. DO NOT SKIP YOUR BACKUP! Click Finish when you are ready to complete Stage 2 and a Shutdown Warning message will appear. Click OK.
- You have now entered the ‘hurry up and wait’ time frame. During this stage of the process the data will be copied over from the source appliance to the destination appliance. Once the data is copied the new target vCenter Server is ‘spun up’ and then the copied data is imported into the new vCenter Server DB. If you pay very close attention you will eventually see the ‘VMware vCenter Server High-Availability data’ being imported followed by ‘post upgrade actions’.
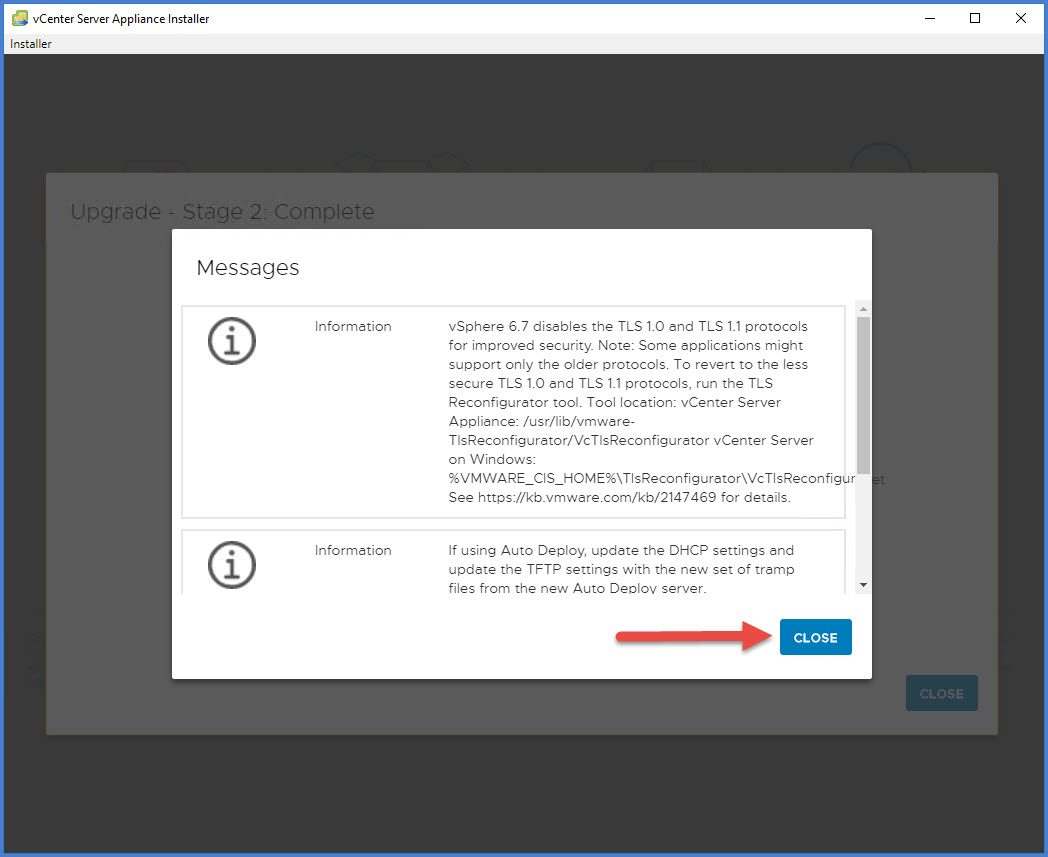
- When Stage 2 completes a ‘Messages’ window will appear providing you some information. Click Close.
- Verify that you have successfully upgraded your vCenter Server appliance. Click Close and proceed to the Appliance Getting Started Page.

- From the Getting Started web page I am going to select the LAUNCH VSPHERE CLIENT (HTML5) option and login with my SSO administrator credentials.
- Once I log into HTML5 client I need to begin validating that my VCHA environment is upgraded to version 6.7 and all appliances in the VCHA configuration are online. The passive and witness nodes are not online and the vCenter HA cluster is in an isolated state. Do not touch anything at this point. If you scroll down through your Recent Tasks you will see a CLONE PROCESS is taking place where the passive node is being created for the newly upgraded VCHA environment. Once the peer is cloned and powered on another clone task initiates for the witness and then powered on. Be patient here!
- Give the appliances some time to complete the initial replication and become in sync with each other. There is no definitive ETA here so please be patient. Continue to refresh the screen. Once the sync completes the vCenter HA configuration will have a status of ‘Mode: Enabled, State: Healthy’. Also notice in the inventory my old vCenter HA appliance is powered down. My suggestion would be to leave the old appliance in the inventory for a brief period of time and then remove it completely.
- The last and final step is validate that your VCHA environment is officially running 6.7. Select the vCenter Server name and then the Summary tab. As you can see from my screenshot below everything is online and good to go!

That concludes the upgrade process!! 🙂
Conclusion and Useful Links
If you’re not using VCHA and are considering it please review the following documentation as there are some recommendations and requirements for a proper deployment. One very important thing I want to point out about VCHA is it is strictly a “high availability” feature and not a disaster recovery feature. So if you have multiple sites your goal should be enabling VCHA in each site and not across sites.
Per David Stamen (Technical Marketing Engineer @VMware) from his Part 1 article which I shared in the links below is a great piece of advice when it comes to designing your VCHA deployment to be successful…
“When deploying VCHA try to use the Basic workflow when at all possible to make the solution easier to maintain and deploy. Protect vCenter Server within a site as you are much more likely to suffer a failure from hardware, network or storage than a total site failure.”
What are some scenario’s where using VCHA could help you and protect your vCenter?
- vCenter Server application / service failure
- ESXi hardware failure or complete host failure
- Shared storage failures (datastores)
- Complete network interruption or network isolation
Links:
- vSphere Central – great content for everything vSphere including vSphere, vCenter Server, ESXi hosts, VMs, Security and much more.
- vSphere Availability Guide (PDF) – vSphere 6.7, ESXi 6.7, vCenter Server 6.7
- vCenter HA starts on page 69.
- VMware vCenter Server HA Performance and Best Practices – vCenter Server 6.5
- Great document to use as a reference for designing your VCHA environment whether you are using 6.5 or 6.7. Most importantly review the “failure conditions” outlined on page 5.
- The ultimate goal with designing your VCHA deployment is to avoid more than one node failure as VCHA is designed to tolerate only one (1) failure and not multiple failures.
- vSphere 6.7 – vCenter High Availability (YouTube Video)
- vSphere 6.7 – Deployment Topologies (YouTube Video)
- vCenter Server High Availability – two part series by David Stamen of VMware
- Protecting the vCenter Server Appliance w/ vCenter High Availability (VMware Docs)
- Correlating Build Numbers & Versions of VMware Products (1014508)
BE SOCIALABLE, SHARE THIS ARTICLE! 🙂

Thanks for the awesome article, it helps. But I am wondering, what if you want to deploy (or have deployed) vCenter HA in different Network Segments? For example: vCenter Active (192.168.0.100), vCenter Passive (192.168.1.100) and vCenter Witness (192.168.1.101). How is the upgrade process different than what you have described?
Thank you in advanced.
Regards,
Andy Caba
LikeLike
Hi Andy! That is 100% impossible to do. When vCenter HA is enabled the workflow CLONES the in-place active vCenter Server. The passive node is identical to the active vCenter HA node. The witness is also cloned from the active vCenter HA appliance and then resized (CPU and memory). The VCHA cluster network is a simple network segment that functions as a heartbeat network. My suggestion for you would be to read the vSphere Availability guide and get a better understanding of the VCHA architecture and requirements.
LikeLike
Great article! Thank you!
Have you tried running the Upgrade procedure from a vm that sits on a different VLAN than vCenter? I’m trying that right now and the new appliance gets deployed in stage 1 but in stage 2, it looks like the VM where the GUI upgrade is running from can’t connect to vCenter. I think it’s likely ssh is blocked by firewalls but having trouble figuring that out. I have also tried adding a second nic to the VM on the vCenter vlan to get around the firewall but that doesn’t seem to help.
LikeLike
Hi Andy
So in a HA environment , I am guessing active vcenter will be upgraded first , so meantime while the active vcenter is being upgraded , will the passive vcenter be available and online while the active one is being upgraded ?
LikeLike