Deploying an NSX Advanced Load Balancer (AVI) controller cluster is a fairly easy task, and a necessary one to ensure system redundancy. That controller cluster needs to be highly available. Achieving HA requires a total of three (3) controller instances to be configured as a 3-node cluster and a cluster VIP. So you will need a total of four (4) static IP addresses in your management network to complete this task. There will be a “Leader” node and two “Follower” nodes once the cluster is online.
You should be familiar with deploying the virtual appliances before starting. I will not be taking you through that process step by step.
Prerequisites for Deployment
Before you deploy the cluster there are some requirements for the Leader and Follower nodes. The Leader node can be any single controller node with or without an initial configuration; at its simplest form and can be freshly deployed with a static IP specified during OVA deployment and that’s it. If you used a single-node deployment like I have in my home lab and the plan now is to expand it to a controller cluster, you can do that as well. The Leader node controller can have AVI SE’s connected to it. (NOTE: Don’t use DHCP for the controller cluster as a reboot can have a negative impact if and when the IP address changes.)
The Follower nodes expected to have no configuration at all. Deploy the two (2) additional OVA’s with the intended static IP addresses, login once to set a password (come in handy later) and then leave them be. Rule of thumb when deploying the follower nodes, make sure you are using the same base and patch version as the leader. I will be deploying the additional controllers to the same IP segment as the first controller for this exercise. There is a guide for Clustering Controllers from Different Networks available but I will not be taking you through this. Controllers are not required to be on the same IP network but there are some limitations that you should be aware of which are summarized on the link provided. This is more common in the public cloud (i.e. AWS Availability Zones).
Here is a summary of my nodes and the static IP’s that I have planned for my deployment. The version I am deploying is 21.1.3-2p2-9049.
| Controller Node | IP Address |
| avi-cluster (cluster address) | 192.168.110.30 |
| avi-ctrl-a (Leader) | 192.168.110.31 |
| avi-ctrl-b (Follower) | 192.168.110.32 |
| avi-ctrl-c (Follower) | 192.168.110.33 |
Step-by-Step
Now let’s go through process of creating a controller cluster. I have my first node deployed and I’m logged into this controller using its management IP address in my browser.
1. Navigate to ‘Administration > Controller > Nodes’ and click the green Edit button in the upper right hand corner.

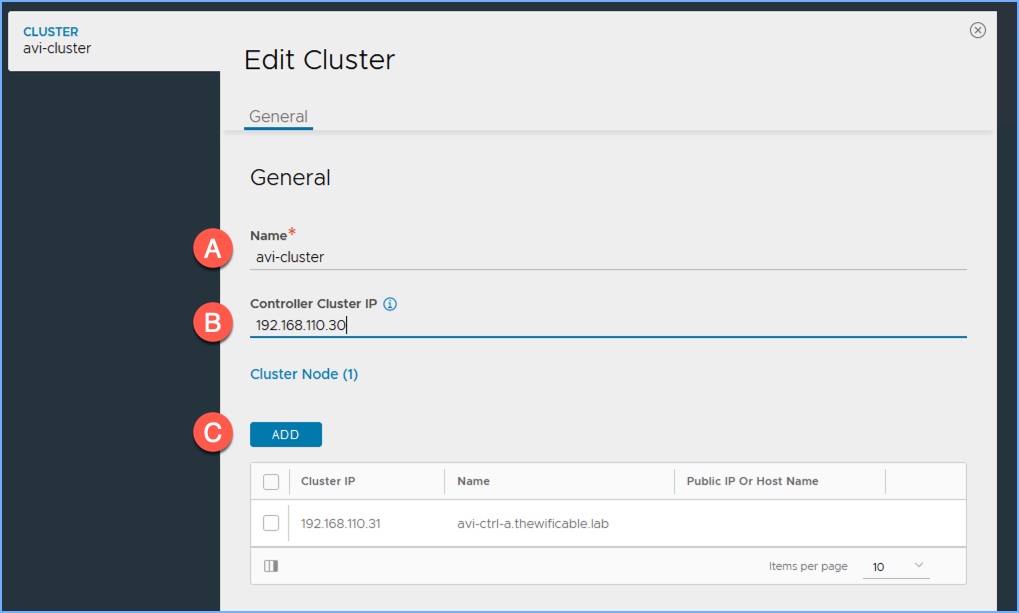
2. In the ‘Edit Cluster’ window I am going to provide a name and controller cluster IP address. Then click Add.
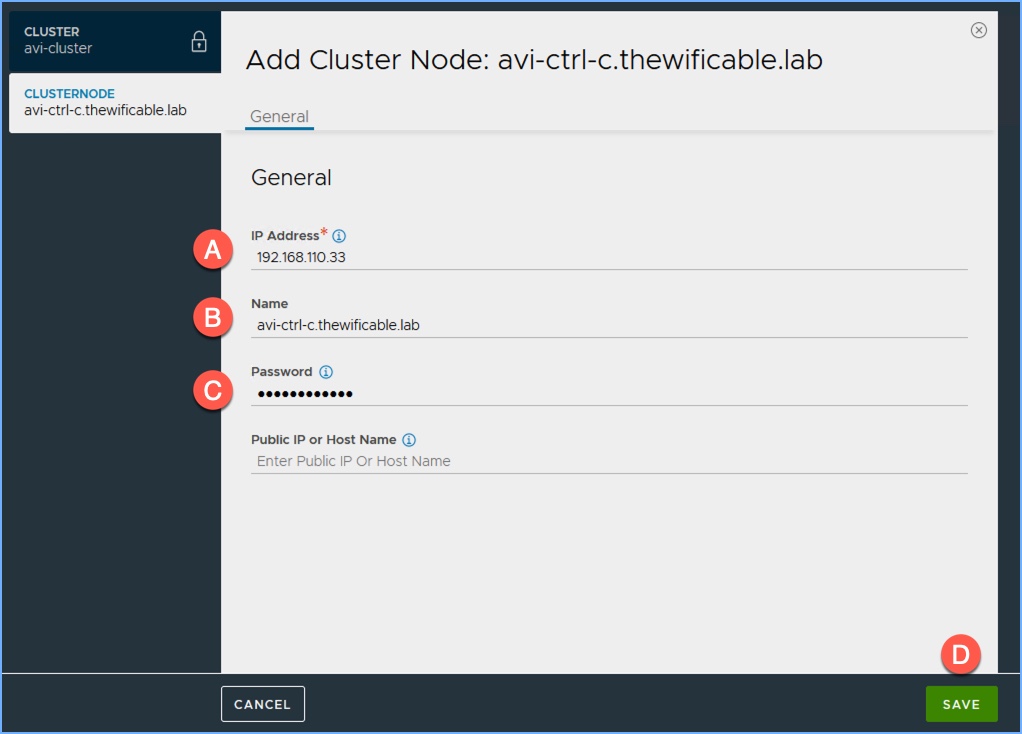
3. When the ‘Add Cluster Node’ window appears, I enter the IP address of my second controller (table above) along with the name and password. Click Save.

4. Then repeat Step 3 for the third controller.
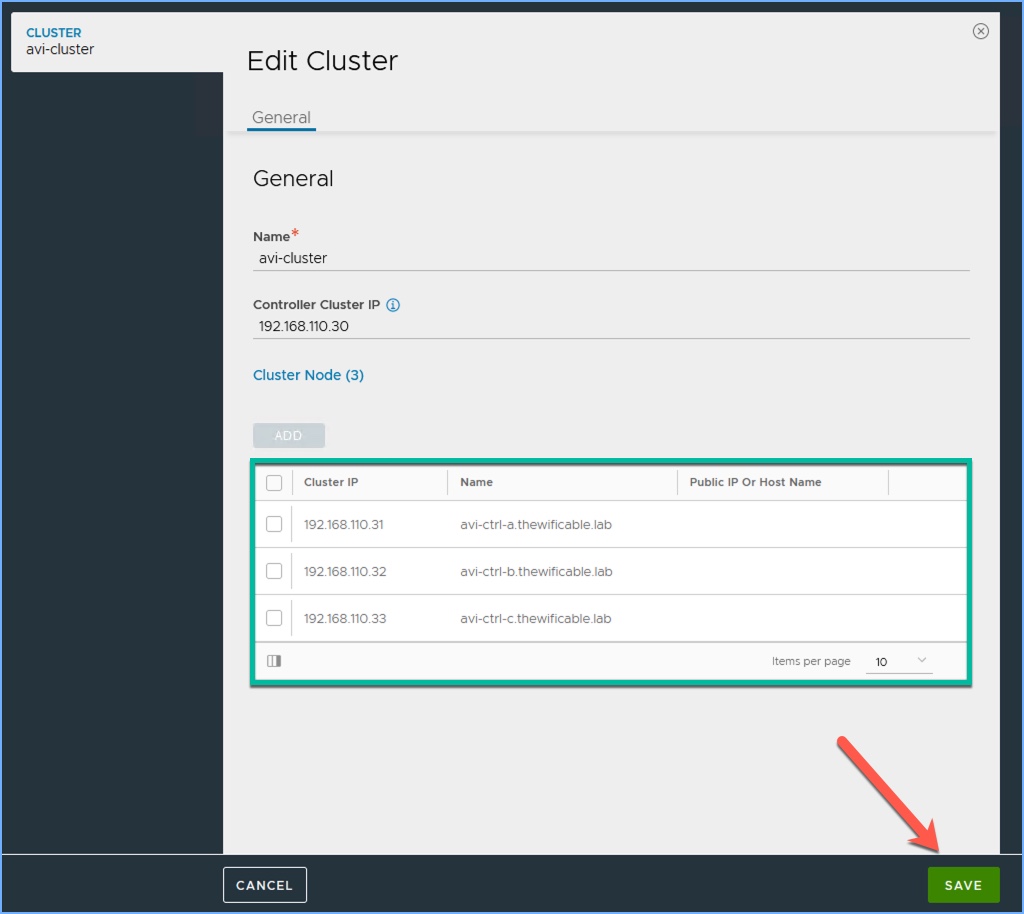
5. My two additional nodes (Followers) are added, I can now click Save.
6. Refresh your browser screen and then start the “hurry up and wait” process where the controllers must initialize. You can also open a command prompt or terminal window and do a continuous ping to the cluster IP to see when that address officially comes online.
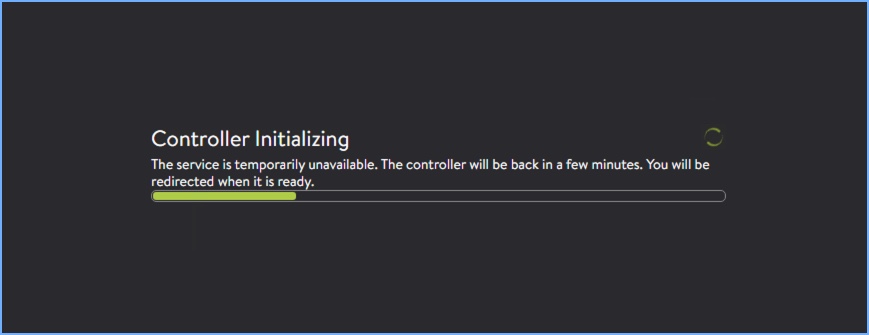
7. After patiently waiting for the controller cluster to form, everything comes online.

Summary
As I stated before the process started, very easy procedure. There is some patience and waiting required by the admin for sure. So what was going on behind the scenes after clicking SAVE? The initial Controller becomes the official LEADER of the new cluster and sends invites to the other controllers to become FOLLOWERS, followed by a ‘warm reboot’ of the cluster. Depending on your environment this can take 2-3 minutes or more. Once that part of the process completes the configuration of the Leader controller is then synchronized to the Follower nodes. The Leader effectively takes on the Cluster IP address as a secondary IP on its management interface. You can now use the Cluster IP to log into the management interface (UI) for the cluster and begin using the NSX Advanced Load Balancer.
Useful Links
Deploying an Avi Controller Cluster (latest)
Deploying an Avi Controller Cluster (Technical Reference v21.1 – PDF)
Cluster Configuration with DNS Hostnames
